Staining a deck creates a barrier between the deck and the harsh conditions it endures each and every day. Without stain, a wooden deck would become dull and warped due to foot traffic, damaging UV rays and rain. Besides protection, staining a deck also allows you to enhance the deck’s appearance by embellishing its wood grain and intensifying its already unique color. All-in-all, staining your deck is necessary if you want the wood to withstand the constant lashing it receives from mother nature. In this how-to-guide, we’ll walk you through the entire process of staining your deck, which includes choosing the stain that best fits your expectations and prepping the deck to ensure the stain works properly once applied.
Table of content
Deck Staining Tools You’ll Need
- Deck Stain
- Deck Cleaner(for older decks)
- Pressure Washer(for older decks)
- 80 grit sandpaper (for older decks)
- Pole Sander (for older decks)
- Garden Hose
- Garden Sprayer
- Stiff-Bristle Broom
- Paint Pad
- Paint Pad Pole
- Paint Brush
- Paint Tray
- Paint Stirrer
- Painters Tape
- Drop Cloth or Plastic Tarp
- Putty Knife
Choosing a Deck Stain
There are three types of deck stains, transparent, semi-transparent, and solid.
A transparent stain is best on newer decks that haven’t been damaged by excessive moisture. The translucency allows the natural grain of the wood to show through, however, it does not supply effective protection against UV rays, and it does not last as long as its counterparts.
Semi-transparent stain lets the wood grain show through and it contains a slight pigmentation, meaning it covers-up small faults in the wood, and provides a bit more protection. Most homeowners choose to use a semi-transparent stain on their decks.
Solid stains do not sink into the wood. Instead, they sit on top of it, which is why they are often used on older decks that have a great deal of wear and tear. Unfortunately, solid stains are known for peeling and chipping after a short period of time.
Testing the Wood
If you’re resealing an older deck, you’ll want to test the wood first to ensure it’s able to absorb the stain. To do so, simply sprinkle a small amount of water on a deck, and wait 10 minutes to see whether the wood absorbs it. If within those ten minutes the water soaks into the deck, the wood is in need of stain, however, if the water forms small beads and does not soak in, it isn’t time to stain a deck just yet.
How to Prepare an Older Deck for Staining
Before you even think about staining a deck, especially an older one, you need to give it a thorough cleaning. If the deck is left dirty the stain will not adhere properly, meaning it will wear off much quicker than anticipated.
To begin the process, remove all your deck furnishings. Once there’s nothing left, take a moment to inspect the deck. If you find any rotting or damaged boards, replace them. Make sure you also take care of any loose or missing deck screws.
Next, sand the whole deck with 80 grit sandpaper and a pole sander, and then clear away the dust leftover with a broom or a leaf blower. Don’t forget to use a putty knife to clean out any dirt and debris wedged between the deck boards
At this point, you’ll want to grab your garden hose and spray the bushes and plants surrounding the deck with water. Once your shrubbery is damp, carefully cover it with a drop cloth to protect it from the deck cleaner you’re about to use.
Read the directions on the back of your chosen deck cleaner before filling your garden sprayer with the solution. Once you’re familiar with the instructions, generously spray your deck with the cleaner. Now grab the stiff-bristle broom from your pile of deck staining tools and start scrubbing. This will help loosen any dirt that’s firmly embedded in the deck’s wooden panels.
When you’re done scrubbing let the cleaner soak into the wood for approximately 10 to 15 minutes. Then, use a pressure washer to rinse the cleaner off the deck. Make sure you equip the pressure washer with the proper nozzle; otherwise, you may end up gauging your deck’s wood boards. After you’ve washed the cleaning solution away, you’ll need to leave your deck alone for two to three days so it can fully dry.
How to Stain a Deck
Weather matters when staining a deck. The temperature must remain between 50 to 90 degrees Fahrenheit with no rain in sight for at least two days. If those conditions aren’t met, you may end up with a poorly stained deck.
If at all possible, avoid staining your deck in direct sunlight. The sun can cause deck stain to dry prematurely, which may leave visible brush strokes in the stain or lead to uneven coloring.
Before you start to stain a deck, use painters tape to protect the siding on your home. Once you’ve covered all the important areas, lay a small drop cloth on your deck, and place your stain can and your deck staining tools on top of the cloth, especially the paint pan. If you skip putting the drop cloth down, you may end up dripping stain all over your deck when you start pouring it into the paint pan.
Another important tip to remember is don’t back yourself into a corner while staining. Basically, this means it’s best to work your way towards your exit instead of starting right next to it. If you do start at the wrong end, you either get stuck for a few hours or you’ll have to walk on your freshly stained deck before it’s dry.
Now that your deck staining tools are laid out it’s time to get started. With your drop cloth in place, open the stain can and carefully mix the stain with a paint stirrer, then pour the stain into a paint pan.
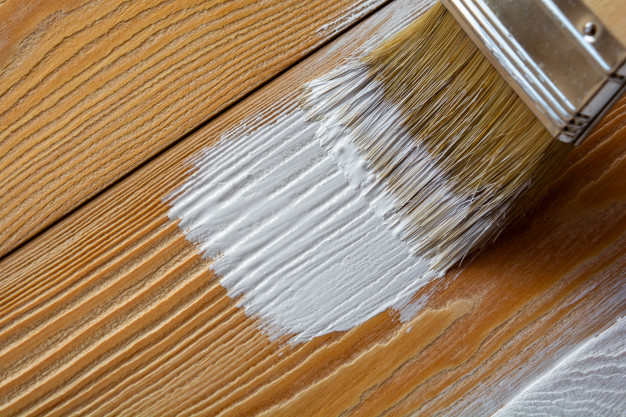
Dip a paint pad attached to a paint pad pole into the stain. Carefully let any excess stain drip off the pad before walking off the drop cloth.
Apply a thin coat of stain to your deck in long even strokes. When the stain starts spreading onto the deck unevenly, it’s time to put more stain on the paint pad.
As you apply the stain to the top of the deck, use the edge of the paint pad to get in-between the deck boards. If you run across any hard to reach areas, such as small crevices, use a paintbrush to stain the spot.
Many stains only require one coat. However, if your stain suggests you apply more than one, you’ll want to wait at least four hours before spreading the second coat on top of the first coat. Applying more than two coats of stain is usually not recommended due to the woods’ inability to absorb more than two coats. If you do add extra coats, you can actually cause the stain to form a film that will eventually peel, and nobody wants to clean up that unsightly mess.
After you’ve finished staining your deck, you generally want to wait 24 to 48 hours before refurnishing it and using it as you normally would.
How to Maintain a Newly Stained Deck
Now that you’ve spent all that time staining your deck you’re going to want to take good care of it. Luckily, a little bit of effort goes a long way when it comes to deck maintenance.
- Sweeping is the easiest way to ensure dirt and wet leaves don’t end up staining the surface of your deck. Occasionally, after you’ve swept your deck, use your garden hose to spray the wood down. This helps loosen and remove any embedded dirt and debris.
- If you live in an area where snow is a repeated occurrence in the winter, make sure you shovel it off your deck as soon as possible. Otherwise, all that moisture can speed up your deck’s deterioration.
- There’s nothing wrong with grilling on your deck, unless you let grease drip onto the wood. Unfortunately, grease stains are almost impossible to remove, so the next time you start up the grill to cook a steak, make sure you put a grease catcher down to stop those unpleasant drips from ruining your stain job.
- Don’t leave your deck furniture and planters in the same place for too long. If you do your deck may end up with mismatched color patches or rotting boards due to trapped water.
- Try to keep trees and bushes at least 12 inches away from your deck. This helps prevent mold, rot, and moss from ruining the wood.
- For safety and maintenance, inspect your deck at least once a year for damaged boards and protruding screws.
- Stain does not last forever, which means you’ll need to reseal your deck every 1 to 3 years. Doing so will ensure the wood doesn’t dull or become warped due to sunlight and moisture.
Staining a deck is key to protecting it from elemental wear and tear. That’s why getting started as soon as possible is best for your deck’s longevity and your wallet.
The responses below are not provided, commissioned, reviewed, approved, or otherwise endorsed by any financial entity or advertiser. It is not the advertiser’s responsibility to ensure all posts and/or questions are answered.